
Anyone Can Commit Code as You on GitHub (Here's How to Stop Them)
Table of Contents
I’ve been signing my Git commits since 2020, and it’s one of those security practices that seems optional until you realize how easy it is for someone to impersonate you. GitHub commit signing uses GPG (GNU Privacy Guard) to cryptographically prove that you, and only you, made a commit.
Anyone can set their git config to use your name and email, push commits, and they’ll show up on GitHub as if you wrote them. For real. The only difference? There’s no “Verified” badge.

What is GPG?#
GPG (GNU Privacy Guard) is an open-source implementation of the OpenPGP standard for encrypting and signing data. While it’s commonly used for encrypting emails and files, it’s also perfect for signing Git commits. When you sign a commit with GPG, you’re creating a cryptographic signature that proves the commit came from someone with access to your private key, not just someone who knows your name and email address.
If you want to dive deeper into the OpenPGP standard, check out the official OpenPGP specification.
Why Sign Your Commits?#
Real-World Impersonation Examples#
Commit impersonation isn’t just theoretical. Here are some scenarios where it actually matters:
- Open source contributions: Someone could submit a malicious commit using a core maintainer’s identity, making it look like trusted code
- Work environments: An attacker with repository access could commit code under your identity, potentially getting you blamed for bugs or security issues
- Audit trails: In regulated industries, being able to cryptographically prove who committed what code can be critical for compliance
- Supply chain attacks: Attackers have impersonated developers to inject malicious code into widely-used libraries, affecting thousands of downstream projects
The “Verified” badge isn’t just decorative. It’s proof that the commit actually came from the key holder, not just someone pretending to be them.

Does Anyone Actually Care?#
Honestly? Most developers aren’t checking verification badges on every commit.
But systems care. Organizations can require signed commits through branch protection rules. Regulated industries need them for compliance. Security tools flag repositories without them. And when supply chain attacks happen, signed commits are the only way to prove what’s legitimate.
This is like HTTPS was 10 years ago. Optional, until it wasn’t.
You’re not setting this up for today. You’re setting it up for when it matters.
This Guide is for macOS#
This tutorial focuses on macOS using GPG Keychain, part of GPG Suite, which provides a nice GUI for key management. If you’re on Linux or Windows, the concepts are the same, but you’ll use different tools:
- Linux: Use
gpgcommand-line tools (usually pre-installed) - Windows: Try Gpg4win or the Linux way if using the Windows Subsystem for Linux (WSL).
The git configuration steps are identical across all platforms. It’s assumed you have a GitHub account and about 15 minutes.
Step 1: Install GPG Tools#
Head to gpgtools.org and download GPG Suite. It includes GPG Keychain, which gives you a visual interface for managing your keys instead of wrestling with command-line tools.
Install it like any other Mac app.
Step 2: Generate Your GPG Key#
Open GPG Keychain and click “New” to create a key pair.
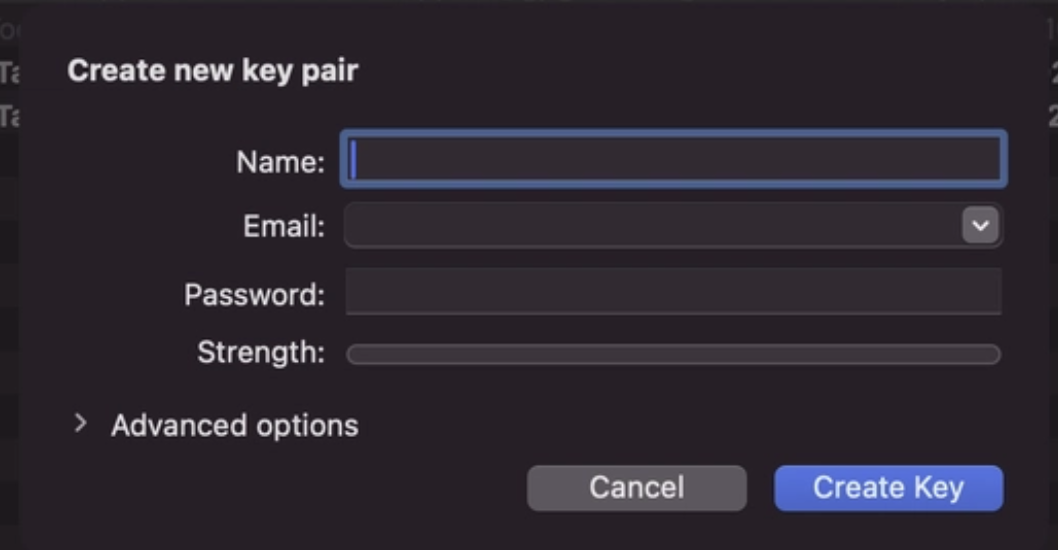
Fill in:
- Name: Your real name (should match your GitHub account)
- Email: The email associated with your GitHub account
- Passphrase: Choose a strong passphrase. You’ll need this every time you sign a commit
Important settings:
- I set my keys to expire after 1 year. This is a good security practice. If your key is compromised, it eventually becomes useless. You can always extend the expiration date when it gets close.
- Make sure the key type is RSA and at least 4096 bits for good security.
Click “Generate key” and wait a few seconds.
⚠️ Back Up Your Private Key
Your passphrase protects your private key, but it’s not a backup. If you lose the private key file itself (like during a computer crash or reinstall), even knowing your passphrase won’t help. Without the private key file, you can’t sign new commits even if you remember the passphrase.
Good backup options:
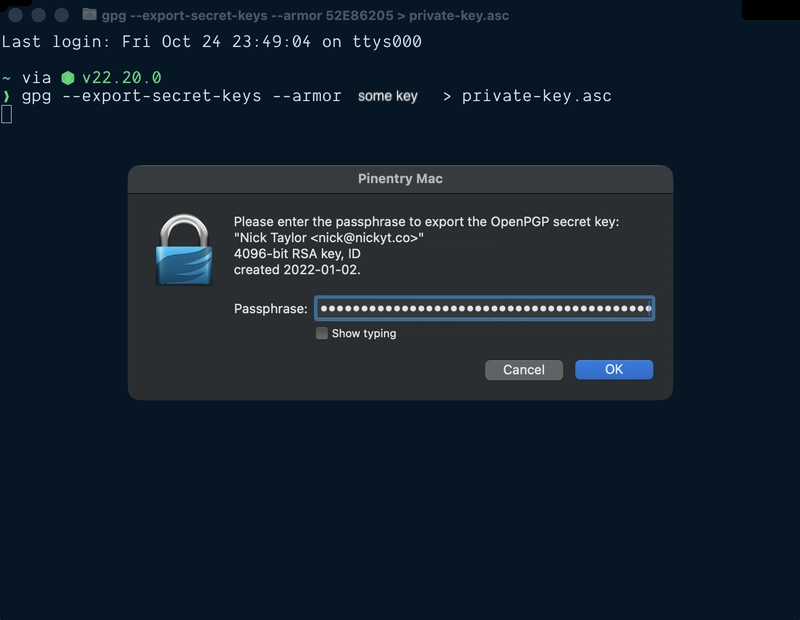
- Export your private key (
gpg --export-secret-keys --armor YOUR_KEY_ID > private-key.asc) and store it in a password manager like 1Password or Bitwarden as a Secure Note. Note you’ll most likely be asked to enter your passphrase.- Back up your entire
~/.gnupgdirectory to encrypted cloud storage- Keep an encrypted copy on a secure external drive
Whatever method you choose, make sure it’s encrypted and accessible only to you.
Step 3: Export Your Public Key#
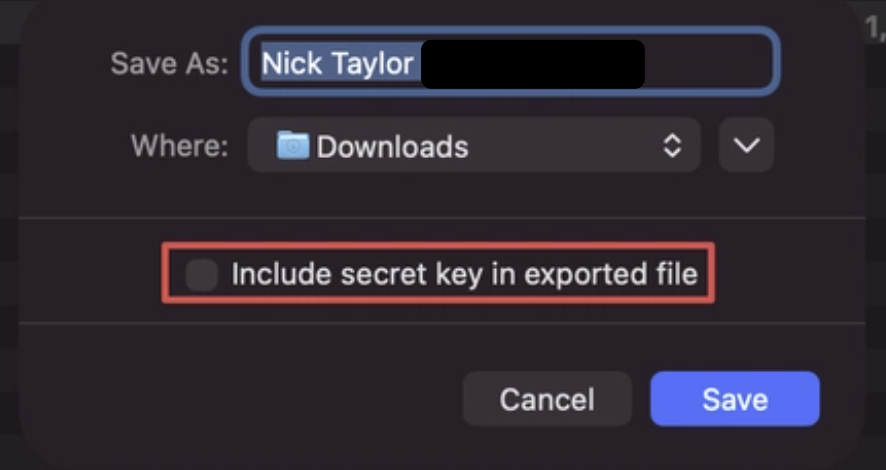
In GPG Keychain, select your new key, then go to Export from the menu (or right-click the key).
Ensure that “Include secret key in exported file” is not checked and save it somewhere.
Open that file in a text editor. It’ll look something like this:
-----BEGIN PGP PUBLIC KEY BLOCK-----
[bunch of random-looking characters]
-----END PGP PUBLIC KEY BLOCK-----Copy that entire block.
Step 4: Add Your Public Key to GitHub#
- Go to GitHub → Settings → SSH and GPG keys
- Click “New GPG key”
- Paste in your public key
- Click “Add GPG key”
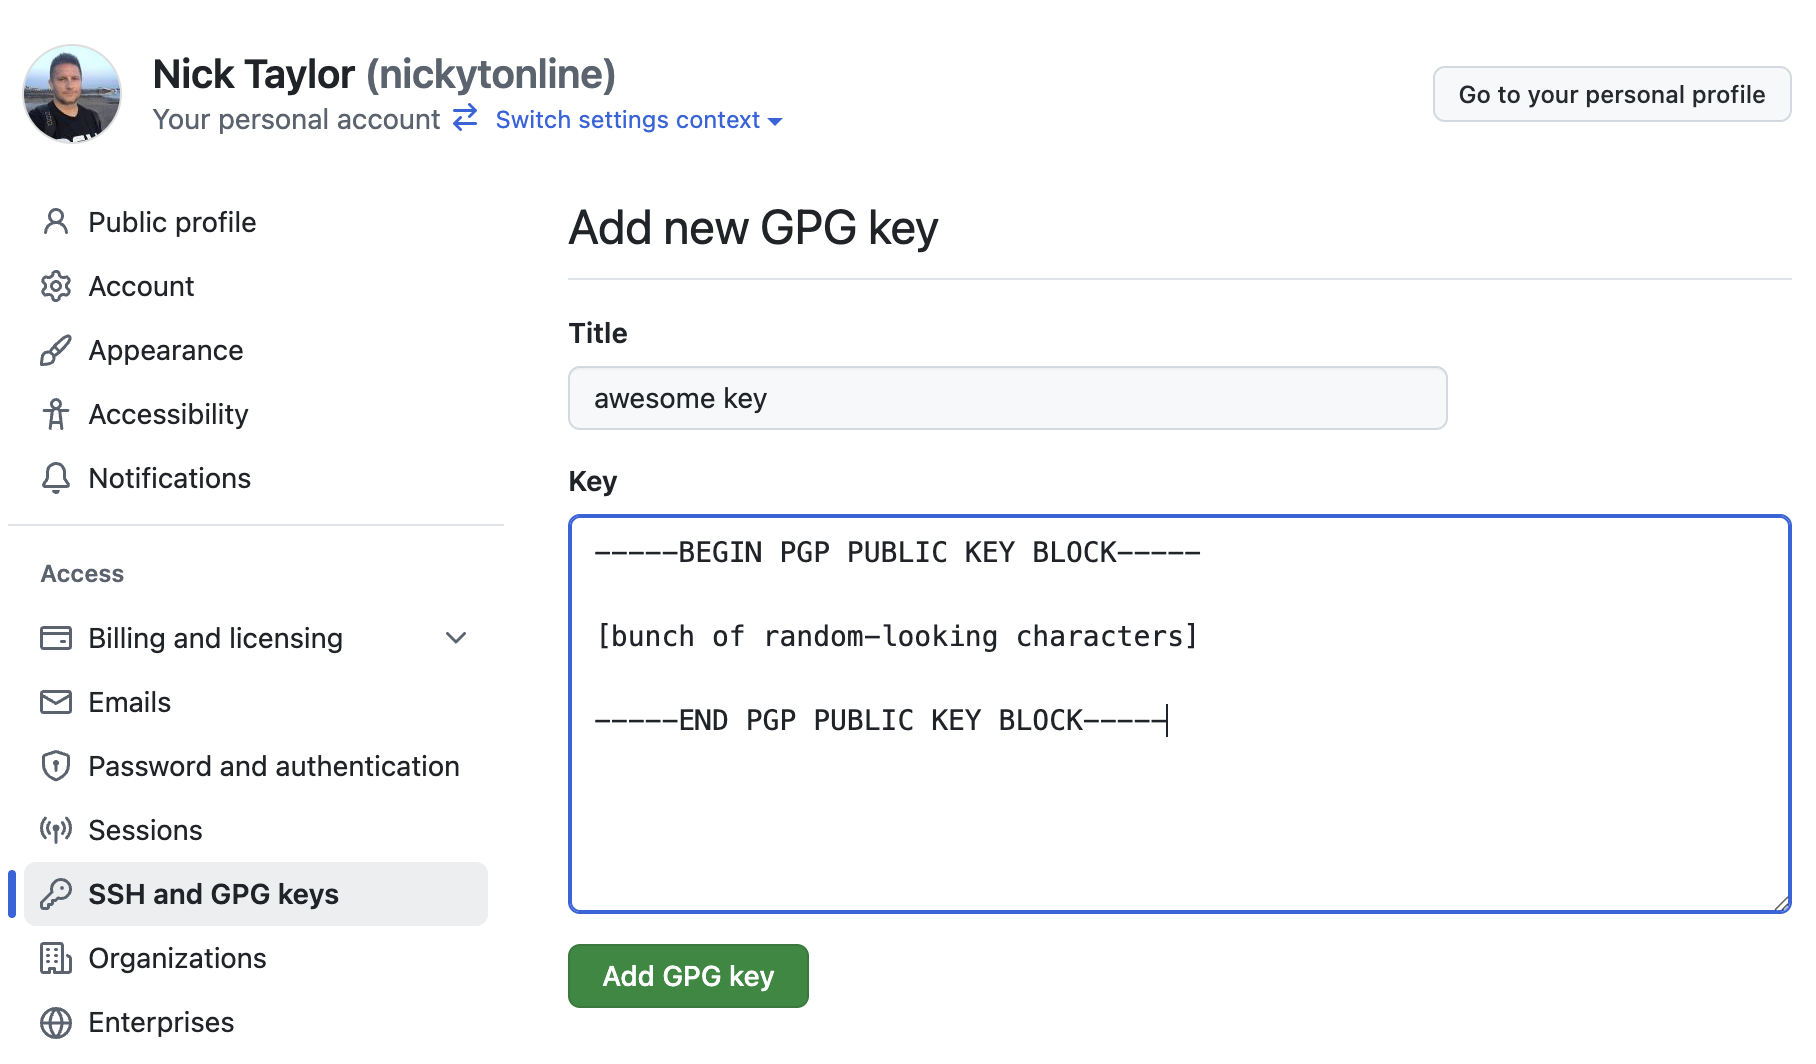
GitHub now knows your public key and can verify commits signed with your private key.
Step 5: Configure Git to Sign Commits#
Open Terminal and run these commands:
First, get your key ID:
gpg --list-secret-keys --keyid-format=longYou’ll see output like:
sec rsa4096/ABC123DEF456 2022-01-15 [SC] [expires: 2026-01-15]That ABC123DEF456 part is your key ID.
Now configure git:
# Tell git which key to use (replace with your actual key ID)git config --global user.signingkey ABC123DEF456
# Tell git to sign all commits by defaultgit config --global commit.gpgsign true
# Tell git where GPG is located (for macOS)git config --global gpg.program /usr/local/bin/gpgIf you want to verify your config:
git config --global --list | grep gpggit config --global --list | grep signingkeyYou should see:
commit.gpgsign=trueuser.signingkey=ABC123DEF456gpg.program=/usr/local/bin/gpgStep 6: Test It#
Create a test commit:
git commit --allow-empty -m "Testing GPG signing"git log --show-signature -1You should see “Good signature” in the output. If you push this to GitHub, you’ll see that sweet “Verified” badge next to your commit.
Note: the first time you do a commit with your GPG key, it’ll ask you for your passphrase and to add it to the Apple keychain. This is completely normal and this is how you’ll avoid being prompted for your passphrase every time.
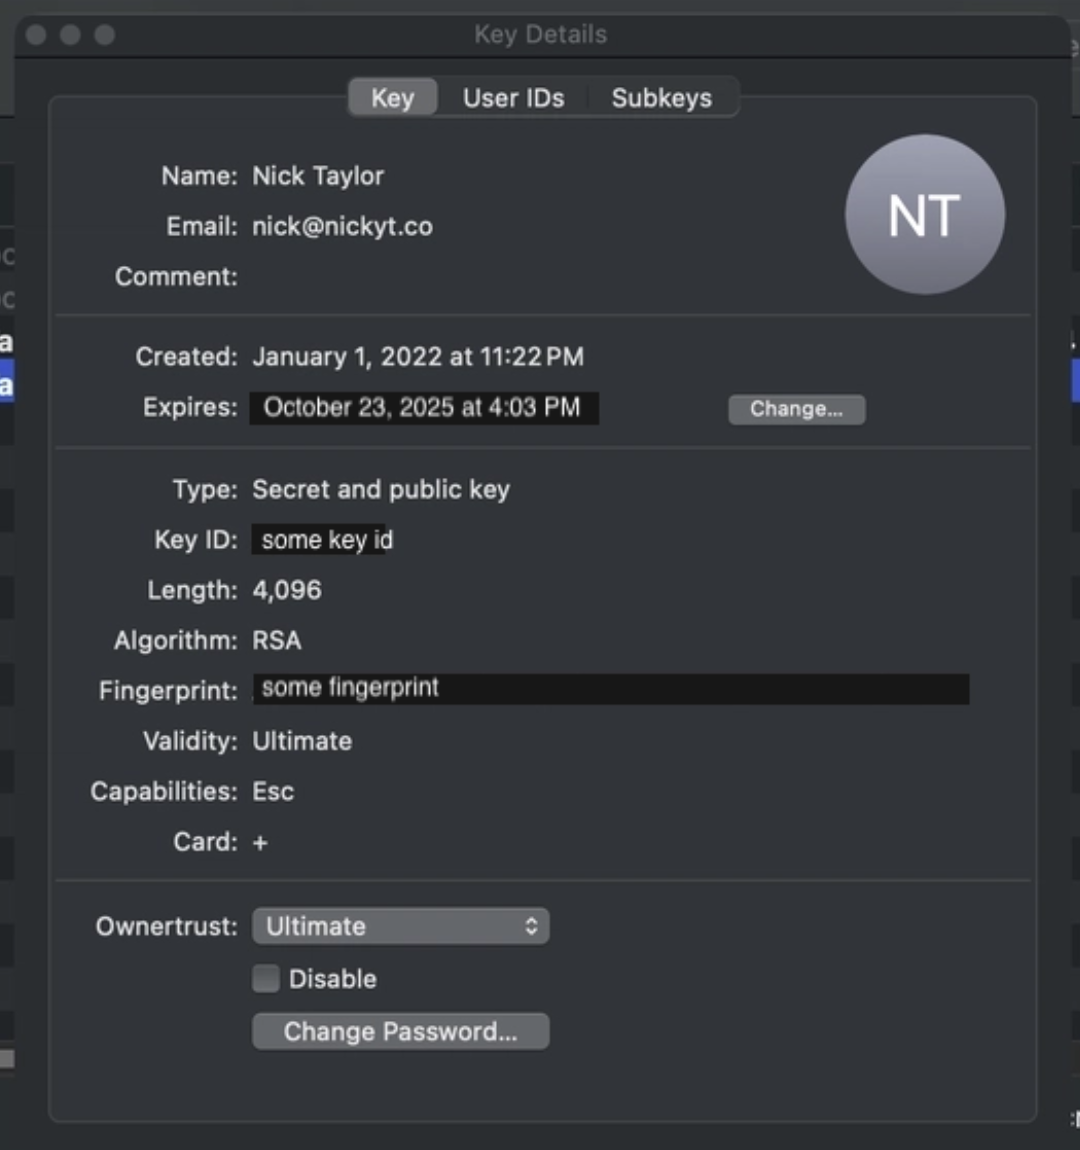
Renewing Your Key (When It Expires)#
When your key approaches expiration, GPG Keychain makes renewal easy:
- Open GPG Keychain
- Select your key
- Double-click to open key details
- Click the Change… button next to the expiration date
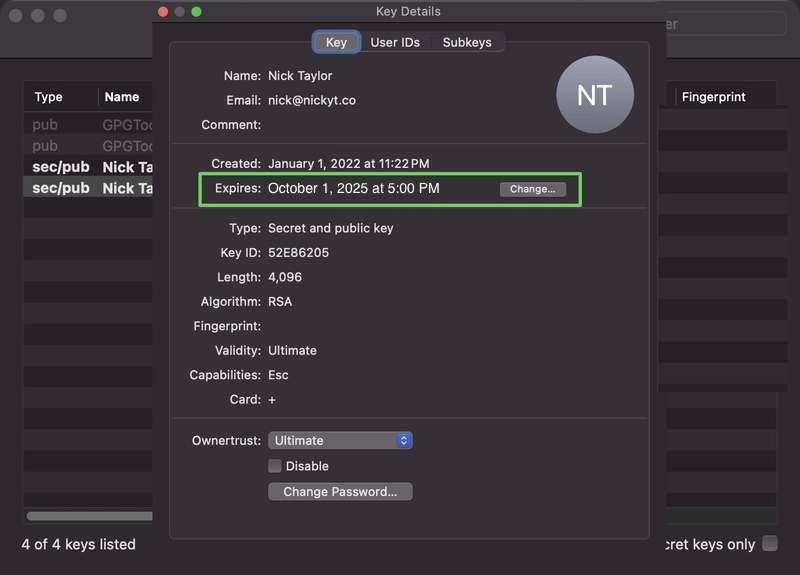
- Choose a new expiration date (I typically extend by a few months)
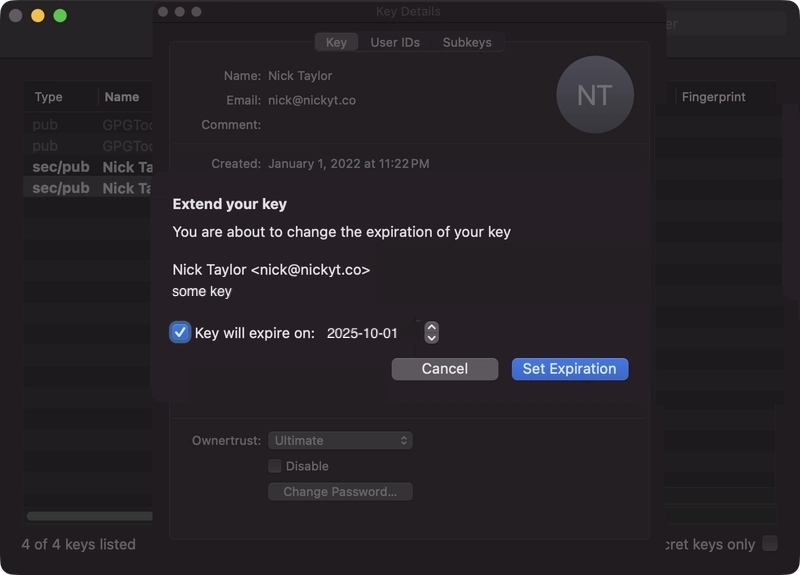
- Enter your passphrase to confirm
You don’t need to update anything on GitHub. The key ID stays the same, so git and GitHub continue working without any changes.
Troubleshooting#
”gpg failed to sign the data”#
This usually means:
- GPG isn’t finding your key: Double-check your key ID with
gpg --list-secret-keys - Passphrase issues: Your passphrase prompt might be hidden. Try running
echo "test" | gpg --clearsignto trigger it - Wrong GPG path: Make sure
git config --global gpg.programpoints to the right location
On macOS, if you installed via GPG Tools, the path should be /usr/local/bin/gpg.
”No secret key”#
This means git is looking for a key that doesn’t exist. Run:
gpg --list-secret-keysMake sure the key ID in your git config matches one of the keys listed.
Commits still showing as unverified on GitHub#
Check that:
- The email in your git config matches the email on your GPG key
- The email is verified in your GitHub account
- You’ve uploaded the public key to GitHub
Wrapping Up#
Setting this up takes about 15 minutes, but once it’s configured, you don’t think about it. Every commit you make is automatically signed, and you get that verification badge proving it’s really your code.
If you’re working on open source or in environments where code provenance matters, signed commits aren’t optional. They’re expected. Might as well set it up now while you’re thinking about it.
If you found this helpful or ran into any issues, let me know in the comments!
If you want to stay in touch, all my socials are on nickyt.online.
Until the next one!